|
|
-- This is the start of the Custom POI Page --5--
CLICK FOR OTHER PAGES or use TOC/Menu
General: Pg
1, Pg 2,
Pg 3, Pg 4, Pg 5,
Pg 6, Pg 7, Pg 8,
Pg 9, Pg 10,
Pg 11, Pg 12,
Pg 13, Pg 14, Pg 15,
Pg 16, Pg 17, Pg 18

Custom POI: Page
1, Page 2,
Page 3, Page 4, Page 5, Page 6,
Page 7, Page 8,
Page 9
7/8X5
Page 1, 7/8X5 Page 2, 7/8X5
Page 3
Info Page TOC/Menu The Newbie Page
|
THE POI'S THE THING
- Seeing Custom POIs At Various Zooms -- Yes You Can!

ACT 1
THE 6,000,000
Scene: On the fields of Thermopylae in front of a narrowed pass between the mountains, named
the 'Hot Gates', just before the big battle. In the distance is the sound of the approaching Persian army. Both
soldiers costumes are sparse.
The Soldier - Dilios: Oh wise king, I can't see my Garm in POIs on my nüvi screen. Do you
have any words of wisdom? in POIs on my nüvi screen. Do you
have any words of wisdom?
The Spartan King - Leondis: [Muscles bulging] Just zoom in to the 200 ft. or 120 ft. level and they will magically appear.
Dilios: But King, I would really like to see all 6,000,000+
at a more zoomed out level.
King Leondis: Just think of each POI as a Persian soldier. If you
saw them all on the screen when zoomed out you would have nothing but a 'carpet' of Persians appearing -- not an appealing thought at this time.
Dilios: I appreciate your humor and have profited by your
point.
King Leondis: Don't forget that Gary Hayman covered this in one
of his articles (*1).
 (HEAR:
30 sec snippet "The 300 Theme") (HEAR:
30 sec snippet "The 300 Theme")
[music revised November 16, 2008]
ACT II
MY FAVORITE POIs
Scene: In the living room of Tim O'Hara's apartment in a suburb of Los Angeles. In the corner,
a black and white TV with an 'Indian Head' test pattern being displayed, is visible. Muffled sounds of traffic
and a distant siren are in the background.
Tim: Uncl e Martin, you're good with electronics, how can I see some icon's
for some POIs at a zoomed out
level on my Garmin nüvi. e Martin, you're good with electronics, how can I see some icon's
for some POIs at a zoomed out
level on my Garmin nüvi.
Uncle Martin: [Antennae sprouting from the back of his head] Tim, the Mother Ship sez if you will make up to 500 POIs your Favorites, you can select choices of icons to represent those Favorites and they will appear
on your screen when you are greatly
zoomed out -- to some extent.
Tim: How do I do that?
Uncle Martin: When you identify a point, be it a new point or one
already identified by Garmin, Save it as a Favorite.
You can then Edit the Favorite and select an icon via the 'Change Map
Symbol' from ~ 85 choices.
You will be able to view the icon, in 2D mode while zoomed out to 120 miles.
Now Tim, if you zoom out that far it will be of no value as the map will be quite large and your vehicle icon will
most probably cover your nearby Favorite icons, anyway. But, at a closer range it can be of value to you.
If you are in the 3D mode, you can see the icon from the 120 ft. to the .8 mile zoom range.
[Antennae sparking] Excuse me Tim, the mother ship is calling.
(HEAR:
30 sec snippet "My Favorite Martian Theme")
[music revised November 16, 2008]
ACT III
SMALLVILLE
Scene: Young Clark Kent and his 'adopting' father, Jonathan Kent are riding a tractor on
their farm in Smallville, Kansas. The tractor sound is muffled and in the background. Dust billows from the rear
of the tractor. The sky is darkening as evening approaches.
Clark: Dad, I was wondering if you are able to see bigge r icons of POIs on your tractor's Garmin when zoomed out
to more than 200 feet? r icons of POIs on your tractor's Garmin when zoomed out
to more than 200 feet?
Jonathan: Well son, No and Yes.
Clark: What do you mean?
Jonathan: You CAN
create quite a bit larger icons (*2), up to 24 by 24 pixels which will respond to special
Custom POI files that create the locations and will present the Custom POIs on your own wrist GPS, for example,
as you do your "up, up and away" when you are leaping tall buildings in a single bound.
Now some think that you can only see these icons if you are zoomed-in to 200 or less
feet. That is true when you are touch-dragging your screen when NOT
in simulation mode or in the en-route (Go mode) -- that's the NO part, but when you activate either of the mentioned modes -- things change and
you can see your larger icons at a much increased zoom-out level
-- that's the YES part.
There are caveats though --
[CONDITION 1] The Custom POI must (*)
be on the road above which you are flying (for us, driving) (*except as mentioned below using TourGuide) and an alert, either speed or distance, must apply to that POI.
When you are approaching the
Custom POI and reach the alert point, if you have set a speed alert or if you have established a distance alert,
the number of feet, (or meters) away that you have previously set
via POI Loader's 'Manual Mode', the icon will SUDDENLY
appear on screen. The large icons can be seen
at many zoom-out levels greater than 200 ft.
Clark: Will my device keep giving me alert signals?
Jonathan: Yes, but that can easily be overcome by having associated
.mp3 or .wav files of 'silence' (*3) coupled to the .csv or .gpx Custom POI file. Of course,
you could deactivate the alert signal but that would cancel all the alerts that you do want to hear.
[CONDITION 2] Now I know that you like to fly at tree top level,
above the roads so that you wont bump into wires and overpasses. But sometimes you stray a little off the road. In that case, you might want to identify the .csv file used to create the Custom
POI with 'TourGuide' as part of the file name and create a distance alert in the 'Manual
Mode' of POI Loader which
will now present the large icon for the location no matter from which way you approach it.
If using the TourGuide (*4) feature you must have all three associated files -- the
'.csv', the icon '.bmp', and the associated '.mp3' (silent or not). Without
the .mp3 file it won't work correctly and the icon won't appear at the zoomed out levels of more than 200 feet.
|
For 200 and 500 series owners, who don't have .mp3 capabilities,
they can use a .wav sound file instead of an .mp3 sound file -- PROVIDED
- the .wav file is in the format of PCM 44.100kHz 16 Bit, Mono
- the file 'sox.exe' (version 14.0.1 NOT
14.2.0) is in the same folder where the POI Loader ('poiloader.exe') that you will be using to create your 'poi.gpi'
file on your nüvi, is located.
See: DON'T MAKE A .WAV - Now nüvi Series 200 Can Have Music, Sound & Voice Alerts for a discussion.
|
While you are at it, you probably want to
make your distance quite large when using the Manual Mode of POI Loader -- many use 5,000, 10,000 or even 20,000
feet as their alert distance -- I think that Batman and Spiderman do. That way you can see the approaching POI
icons miles in advance while you are at zoomed-out settings above 200 feet AND
if 'TourGuide' is included in the file name you can be off-road, zig-zagging all you want.
Clark: Thanks Dad, I say this daily, "You are the best man on this planet."
THE END
The audience rises to a standing
position.
One can hear wild applause and the call -- Author! Author!.
(HEAR:
30 sec snippet "Smallville Theme")
[music revised November 16, 2008]
Summary:
1. The 6,000,000+ Garmin POIs can be seen at a zoom-in level of 200 ft. or less.
They will vanish if you zoom-out more than 200 ft. - which you generally
do. The icons are very small.
2. If you create a Favorite, even if it is in the same place as one of the 6
million Garmin POIs, it's icon can be seen at many zoom-out levels
(less in 3D than 2D). You can edit the icon with ~85 default choices. These icons are also 'smallish' but do remain
the same size as you zoom way out.
3. You can establish a Custom
POI with an associated large
24x24 pixel icon (.bmp) which can be seen at a variety of zoom-out levels when in the 'Simulation' or 'Go' modes when your vehicles icon is within the alert range. You can establish a large distance 'on-road' alert to force the icon to appear well in advance
and can even take advantage of the 'radius alert' properties of the TourGuide
element included in the .csv file name so that approaching the location from any direction will trigger the appearance of the icon -- provided your unit has .mp3 capability or you use 'sox.exe'
and a special format .wav sound file (see article
(*5)).
When NOT in either of the mentioned modes, you must be zoomed-in
to 200 ft. or less to see them unless you are within their pre-set alert distance -- at
which time they will appear on screen -- at most any zoom level.
REFERENCES
(*1) I CAN'T SEE THE ICONS - Zoom In Please
(*2) [For some information] FAST CARS AT RIDGEMONT HIGH - Souped-up
Speed Alerts
MY POIs - Custom POI Favorites
(*3)[For some information] RUN SILENT -- RUN NO-PEEP - Silent and
Semi-Silent Alerts
(*4) THE 'PROXEMICS' OF THE TourGuide - Hakuna Matata! The Circle Of ...
Alert
(*5) DON'T MAKE A .WAV - Now nüvi Series 200 Can Have Music, Sound & Voice Alerts
Sample 24x24 pixel .bmp
icon

Right click this link (not the icon),
visible.bmp
NOTE: 'Save Target As' (IE) = 'Save
Link As' (Firefox)
Select (in IE) 'Save Target As', and
save the file in folder 'POIcollection' (or what you have chosen). BE SURE
that the file is saved with the proper file type '.bmp'. You may have to adjust your 'Save as Type' to 'All Files'
to do this. Adjust the file name to what you want. Remember, the prefix must match the prefix of your .csv file and
the suffix must be '.bmp'.
Sample .mp3 file of silence
Right click this link
silence.mp3
Select (in IE) 'Save Target As' and
save the file in folder 'POIcollection' (or what you have chosen). BE
SURE that the file is saved
with the proper file type '.mp3'. You may have to adjust your 'Save as Type' to 'All Files' to do this. Adjust the file name to what you want. Remember, the prefix must match the prefix of your .csv file and
the suffix must be '.mp3'.
Sample .wav file of silence
[For those who don't have
.mp3 capability and must use .wav files coupled with sox.exe for
alerts See: DON'T MAKE A .WAV - Now nüvi Series 200 Can Have Music, Sound &
Voice Alerts]
Right click this link
silence.wav
Select (in IE) 'Save Target As' and
save the file in folder 'POIcollection' (or what you have chosen). BE
SURE that the file is saved
with the proper file type '.wav'. You may have to adjust your 'Save as Type' to 'All Files' to do this. Adjust the file name to what you want. Remember, the prefix must match the prefix of your .csv file and
the suffix must be '.wav'.
081015


ALERT! GEOCACHE POINT NEAR -
On And Off-Road Geocache Point Alerts With Map Icons For nüvis
I received an e-mail from Indiana reader, Jay West who is e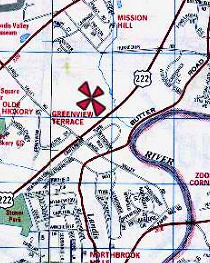 ngaged in the activity/hobby/game of Geocaching using his nüvi
as a guide. Jay wrote that he was able to have his device alert him as he approached Custom POI geocache points
that were on or near (~50 ft) the road on which he was traveling but he was not alerted to any of the
geocache points that were off road -- and they were in the majority. ngaged in the activity/hobby/game of Geocaching using his nüvi
as a guide. Jay wrote that he was able to have his device alert him as he approached Custom POI geocache points
that were on or near (~50 ft) the road on which he was traveling but he was not alerted to any of the
geocache points that were off road -- and they were in the majority.
He was wondering if there was something he could do to have
alerts for ALL his geocache points. Jay obtains his geocache .gpx files from various sources on the Internet.
There is a method that can be used by nüvi owners who have built in .mp3 playback capabilities (300, 600,
700, 800 series).
|
For 200 and 500 series owners, who don't have .mp3 capabilities,
they can use a .wav sound file instead of an .mp3 sound file -- PROVIDED
- the .wav file is in the format of PCM 44.100kHz 16 Bit, Mono
- the file 'sox.exe' (version 14.0.1 NOT
14.2.0) is in the same folder where the POI Loader ('poiloader.exe') that you will be using to create your 'poi.gpi'
file on your nüvi, is located.
See: DON'T MAKE A .WAV - Now nüvi Series 200 Can Have Music, Sound & Voice Alerts for a discussion.
|
The technique which I have used in other articles is quite
easy -- but I have never discussed it with .gpx files in mind.

But first, a little bit about the interesting hobby/activity/game of Geocaching. If you are already a geocacher
you can skip the following box. I am not a geocacher, but after doing the research for this article I may try my
hand at it. BTW, our nüvis are not primarily designed for geocaching. There are other Garmin and competing
manufacturers that have uniquely designed hand held, long battery life units with special features that are better
suited; but for playing around until you become committed to the activity, you can use your nüvi.
|
GEOCACHING INFORMATION
Geocaching.com tell us that, "Geocaching is a high-tech treasure hunting game played throughout the world
by adventure seekers equipped with GPS devices. The basic idea is to locate hidden containers, called geocaches,
outdoors and then share your experiences online. Geocaching is enjoyed by people from all age groups, with a strong
sense of community and support for the environment..."
Wikepedia writes, "Geocaching is an outdoor treasure-hunting game in which the participants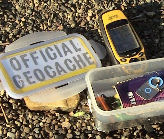 use a Global Positioning System (GPS) receiver or other navigational techniques to hide and
seek containers (called "geocaches" or "caches") anywhere in the world. A typical cache is
a small waterproof container containing a logbook and "treasure," usually toys or trinkets of little
value. Today, well over 800,000 geocaches are registered on various websites devoted to the pastime. Geocaches
are currently placed in over 100 countries around the world and on all seven continents, including Antarctica.
... use a Global Positioning System (GPS) receiver or other navigational techniques to hide and
seek containers (called "geocaches" or "caches") anywhere in the world. A typical cache is
a small waterproof container containing a logbook and "treasure," usually toys or trinkets of little
value. Today, well over 800,000 geocaches are registered on various websites devoted to the pastime. Geocaches
are currently placed in over 100 countries around the world and on all seven continents, including Antarctica.
...
...The finding geocachers record their exploits in the logbook and online. Geocachers are free to take objects
from the cache in exchange for leaving something of similar or higher value, so there is treasure for the next
person to find...
...Typical cache treasures
are not high in monetary value but may hold personal value to the finder. Aside from the logbook, common cache
contents are unusual coins or currency, small toys, ornamental buttons, CDs, or books..."
I highly recommend you visiting Geocaching.com and browse around. You will be able to find lists of caches
and coordinates in your own zip code which might promote your interest in this treasure seeking game.
|
Let's remember what we want to do. We want
to be able to drive a road and when a geocache
point is in the proximity
(a setable radial circle type)(both
on and off road) we will
receive an alert notice via
sound and screen and a large icon will appear at the geocache point no
matter what zoom level we
are at.
We will assume that your collected .gpx file is valid and does not have a distance alert setting -- if it does,
we will handle those cases later. We will also assume we want an alert radius of 3000 feet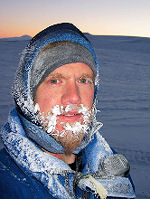 , although that can be changed to almost
anything we want. , although that can be changed to almost
anything we want.
OK, lets say that you have downloaded a geocache file from a valid source of various geocaches in and around the
city of Duluth, Minnesota. It is Summertime -- for few go to Duluth in the Winter for geocaching -- or almost anything
else. ;-) The original file is named 'duluthcache.gpx'.
A Very Easy Method
1) Make a copy of the .gpx file and place it in the folder that will be used by POI Loader. (We want to save the
original of the file, un-doctored, for a possible later adjustment of some sort.)
2) Rename the new file to:
'duluthcache TourGuide3000.gpx'
TourGuide is one word with the T and the G
being upper case.
3) Add an appropriate .bmp 24x24 icon file (I'll
give you one. You can use others) to the same
folder and name it:
'duluthcache TourGuide3000.bmp'
4) Add an appropriate .mp3 (or .wav) alert sound file (I'll give you one. You can use others)
to the same folder and name it:
'duluthcache TourGuide3000.mp3' or
'duluthcache TourGuide3000.wav' (for those who
are using .wav files)
5) Use POI Loader, in Manual mode, to upload those three files (and others that you may have
in the folder) to your nüvi from your computer via the appropriate USB connecting cable. When asked to choose
the settings for 'duluthcache TourGuide3000.gpx' check 'this file contains proximity alert points',
'alert whenever you get close to
a point', and set the distance at: 3000. You can see that the 3000
in the file name reminds you of the alert distance to establish. You may be processing many files with different
distance alert desires and this is a good technique for signaling you the proper distance setting when using Manual
mode..
That's it!
We have used techniques that are explained in more detail in my previous articles:
You now can drive along the road and whenever you are within 3000 feet of a geocache, be it on or off road, an icon
will appear on your screen and an alert will sound. You, of course, can adjust the distance setting using a slight
variation of the above.
If you find that your alert triggers at a different
distance setting than you have asked for,
it may be due to an alert distance imbedded in the original .gpx file that takes priority over your 'Manual' setting.
If this be the case, using a .gpx Editor will allow you to make an adjustment to the distance. I believe that this
may be rare. In one case that I found when I opened up the .gpx file using Microsoft Notebook I noticed the lines:
<WaypointExtension xmlns="http://www.garmin.com/xmlschemas/GpxExtensions/v3">
<Proximity>469.510</Proximity>
</WaypointExtension>
It turns out that '469.510' was in meters which was causing  my distance setting to be 1540 feet no matter what I set in POI Loader - Manual mode. I just simply changed that number to '1000.000' and that set my alert distance to 3281 feet. I
then re-saved the file with a .gpx suffix. Since the distance was now built into the .gpx file I didn't have to
do any settings with POI Loader. [If
that was the only file I was processing to my GPS, I then could have used the Express mode as the alert distance
would have been built into the .gpx file.] my distance setting to be 1540 feet no matter what I set in POI Loader - Manual mode. I just simply changed that number to '1000.000' and that set my alert distance to 3281 feet. I
then re-saved the file with a .gpx suffix. Since the distance was now built into the .gpx file I didn't have to
do any settings with POI Loader. [If
that was the only file I was processing to my GPS, I then could have used the Express mode as the alert distance
would have been built into the .gpx file.]
Another technique would be just to eliminate the entire Waypoint Extension text reflected above and re-save the
file as a .gpx file. Now, when you use POI Loader in Manual mode you WILL specify the alert distance as 3000 (or what you want).
I am not sure that ALL .gpx geocache files will look like what I have listed above as far
as a possible distance inclusion, but this will give you an idea. Fortunately I don't believe that there will be
many files that you will have to internally adjust.

If, while driving, you spot a cache and decide you would
like t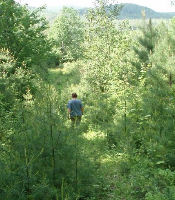 o spend
a little time searching for it, you would most probably now set you nüvi to drive to the particular Custom
POI (cache). You will be taken along roads to a point near the cache and then your nüvi will draw a straight
off road line to the cache (most caches are off road). You leave your vehicle (safely I hope -- and wisely parked)
resetting your nüvi to off road (in Tools/Navigation area) and proceed on foot to the cache guided
by your nüvi and the flag on the screen. o spend
a little time searching for it, you would most probably now set you nüvi to drive to the particular Custom
POI (cache). You will be taken along roads to a point near the cache and then your nüvi will draw a straight
off road line to the cache (most caches are off road). You leave your vehicle (safely I hope -- and wisely parked)
resetting your nüvi to off road (in Tools/Navigation area) and proceed on foot to the cache guided
by your nüvi and the flag on the screen.
Please be careful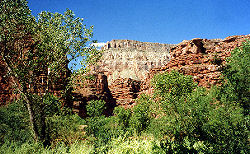 of ditches, canyons, rivers, lakes, mountains, briar patches, mad
farmers with shotguns and even madder bulls that may be in your path. When you have arrived, you will have to look
around to find the cache. Your nüvi GPS has only guided you to the area of the cache. Now the onus is yours. of ditches, canyons, rivers, lakes, mountains, briar patches, mad
farmers with shotguns and even madder bulls that may be in your path. When you have arrived, you will have to look
around to find the cache. Your nüvi GPS has only guided you to the area of the cache. Now the onus is yours.
Obtaining Your Sample Icon And Voice Alert Files
Here's the sample geocache point
icon 
To get it: Right click the following link (not the above icon)
cache.bmp
NOTE: 'Save Target As'
(IE) = 'Save Link As' (Firefox)
Select (in Windows) 'Save Target as' and save the file in the folder to which you will be pointing POI Loader.
AGAIN BE SURE that the file is saved with the proper file type '.bmp'. You may have to adjust your 'Save as Type'
to 'All Files' to do this. Adjust the file
name to what you want. Remember, the prefix
must match the prefix of your .gpx file and the suffix must be '.bmp'.
Here are the sample alert .mp3
and .wav sound files
To get it: Right click the appropriate following link
To hear it  : Left click the appropriate
following link : Left click the appropriate
following link
cache.mp3
cache.wav
Select (in Windows) 'Save Target as' and save the file in the folder to which you will be pointing POI Loader.
AGAIN BE SURE that the file is saved with the proper file type '.mp3' or 'wav' (whichever is appropriate). You
may have to adjust your 'Save as Type' to 'All Files' to do this. Adjust the file name to what
you want. Remember, the prefix must match the prefix of your .gpx file and the suffix must be '.mp3' or '.wav'
(whichever is appropriate).
I once went geocaching but my nüvi
took me through a cavern, into a canyon, where they were excavating for a mine. I traveled through brambles, my
clothes were in shambles, and I was bitten by a serpentine. Result? I was lost forever and not a single person
pined.
081114
DID YOU PUT ON THE RIGHT SOX.EXE THIS MORNING? -
Getting Your .WAV Sound Back
Nüvi 200 and 500 series owners -- have you noticed that your .wav files that you are
using to substitute for .mp3 files for Custom POI alerts for your units aren't sounding?
This could be due to the possibility that you downloaded from SourceForge.net the 'newer' version of 'sox.exe', version 14.2.0, and placed it in the folder that
contains POI Loader ('poiloader.exe') replacing the previous WORKING
copy of 'sox.exe'.
Recently, SourceForge has updated 'sox.exe' to version 14.2.0 WHICH DOES
NOT WORK WITH THE TWO LATEST VERSIONS
OF POI LOADER TO PERMIT THE .WAV SOUNDS FOR THE NüVI SERIES.
SourceForge does not offer (at the present) a link to obtain 'sox.exe'
version 14.0.1 -- THE VERSION THAT
WORKS FOR WHAT YOU WANT TO DO.
HOWEVER you can currently obtain a FREE copy of the proper 'sox.exe' at:
http://rs56.rapidshare.com/files/139638423/sox.zip [Thanks
to Gary A. of Tampa, FL]
Just download the zip file and un-zip placing the 'sox.exe' file in the SAME
folder where your 'poiloader.exe' is located. [Probably C:\Garmin or C:\Program Files\Garmin]
If you have already put the 'non-working' new version in that folder, let the older version replace it and you
can have voice or sound alerts back again instead of bongs or pings.
Check for other copies of 'sox.exe' on your computer and either delete them or change their file names to something
like 'sox.exe.old' so there will be no future confusion as to which versions they are.
081205
THE AUSTRALIAN BICYCLER'S DILEMMA -
The Magic Targeted Alert On/Off Switch
Reader Tim Hackney of Newcastle, Australia wrote, 
"After I ran into my car port with my
bike on top of my car damaging both, I thought Id better develop some way of reminding me that the bike is on
top of the car. It seems to work so far. One problem is that I have not developed a simple way of switching the
Is the bike on top poi off when I dont have a bike on top. Do you have any suggestions? I use a nüvi 760."
He continued, telling me that he created a .csv file that identified his car port as a Custom POI, associated a
.bmp icon with the file as well as a voice alert .mp3 file. He then loaded this file, along with his other .csv
Custom POI files, into his nüvi and using POI Loader's Manual setting and established a distance alert setting.
This means that as he approached his house the voice alert would remind him that his bicycle 'might' be on top
of his car.
Of course, as he said, he
would like to easily turn this alert off when a bike was not on his roof.
Perhaps you might think he could turn off the alert when he didn't want it via the Tool > Proximity Points >
Alerts - and un-check Custom POIs but this would turn off ALL of his Custom Alerts that he wanted to sound; such
as Kangaroo Crossing Cameras, Kiwi Speed Zones, and Outback Steak Houses. Certainly, muting all sound would not
be an option.
Well, you say, one CAN'T singularly select a single Custom POI for an on or off choice.

Or can one?
Of course this is the Garmin Tricks, Tips Work Arounds and yada, yada, yada Web site -- where MAGIC,
even OUTBACK MAGIC, happens.
We are going to borrow some techniques from some previous articles and make them work for us.
(1) CUSTOM POIs - TO SD CARD OR GARMIN'S MEMORY - You Have a Choice
(2) ABBA SINGS "WHAT'S
THE NAME OF THAT FILE" - A File Rename That Does Wonders
We will need an extra SD card. A low memory, very cheap or free (maybe one from a replaced digital camera) SD card
and place it in our nüvi. We will call this SD card the 'Bike Card'.
We next establish a folder on our computer. Let's call it 'Bike On Top'.
Into that folder we place our original three files (file names furnished by Tim)
- 'Is The Bike On Top.csv' -- contains coordinates of the street and driveway juncture of the house
- 'Is The Bike On Top.mp3' -- voice alert file
- 'Is The Bike On Top.bmp' -- 24x24 icon
[Make sure that these file are NOT also in your normal POI folder to load to your nüvi. You don't want duplicates
here.]
Now using POI Loader, in Manual mode setting the alert distance, by hand, to, let's say, 2000 or 3000 ft. We send
the files information from the 'Bike On Top' folder to the SD Card (the Bike Card) in
the device via the USB connection between the computer and the nüvi. The file 'poi.gpi' will be established
on the SD Card.
Using the directory system of Windows Explorer, we locate the 'poi.gpi' file on the SD card
and re-name it 'bikeontop.gpi'
Disconnect the USB cable and you are ready to go.
- If you put the bike on top
of your car you insert the 'Bike Card' into your nüvi.
- If you take your bike from
your car you remove the 'Bike Card'
The insertion or removal of the 'Bike Card' acts like an on/off toggle switch for that single Custom POI. Sim Sala Bim.
If you would like to hear Tim's .mp3 vocal alert, left
click the following link
Is The Bike On Top.mp3 [furnished
by Tim Hackney]
| You can visit Tim's bicycle group's Web
page (called Geriatric Playgroup - sometimes Gerry Playgroup) HERE. There's an excellent and interesting bicycle slide show on the front page. From
the photos, it looks as if the group engages in mountain bike cross country riding. Tim is the Webmaster. |
click to play
081220
YOUR NÜVI AND CUSTOM POI .CSV FILE ON
THE GOLF COURSE
- A Follow-on Article For Using Your nüvi On The Fairway
You will discover on Page 7 of this Garmin "Tricks" WEB site, an article entitled:
HOW
FAR IS IT OVER THAT LAKE ANYWAY? - Using Your nüvi On The Golf Course.
Author Michael Dorsey is suggesting the use
of your Garmin nüvi on the golf course to reflect distances to each green of a golf course where you have
identified each green as a 'Favorite'. Your Garmin, with a little prodding on your part, will provide you with
the 'yardage' from where you are standing to your next hole.
 For the entire
technique you are invited to read his contribution and see his technique using Google Earth -- and the editor's
suggestion of using Google Maps. For the entire
technique you are invited to read his contribution and see his technique using Google Earth -- and the editor's
suggestion of using Google Maps.
It was later suggested by GadgetGuy2008 than instead of sending the locations as 'Favorites' to your nüvi,
send them as Points of Information (POI) as part of a .gpx file and
identified several programs that you could use. Since there is 'almost' an unlimited cache for storing POIs on
your nüvi you can store and keep many golf course green coordinates on your device, ready to use. Using the
.gpx file will provide you with many additional alternatives such as additions of .jpg photos and maps, plus expanded
notes, directions and information. You may want to inspect the use of a .gpx file.
But, a simple .csv file can give you an acceptable, quickly prepared file
that your nüvi can use for POIs of the golf course greens. If you have gotten this far in your reading you
already know to what I am referring.
You won't have the linked .jpgs and expanded notes, but in most cases you wont need them for personal use. And,
the file can be quickly written using Notepad, or similar text editor, and saved as a .csv file.
TECHNIQUE
Here is the way you can establish a quick .csv Custom POI file for a golf course. You can repeat the technique
for other golf courses on which you play.
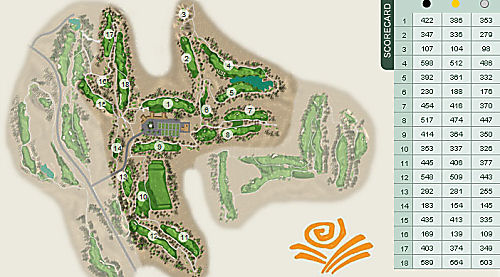
Today we are going to choose the extremely lovely, Ventana Canyon Mountain Course, which is located at the Ventana Canyon Resort, Tucson, AZ.
We first want to see what the golf course looks like and which link is which. For a map, GO HERE
Click on Mountain Course to see the course map.
Leave this Tab open on your computer. You
will use it for comparison with your Google
Maps screen.

In another Tab link to http://maps.google.com which will open Google Maps
- In the location box type in 'Tucson, AZ' and press Search Maps.
- In the same box type in 'Ventana Canyon Golf and Racquet Club' and press Search Maps.
- Click on (A) Loews Ventana Canyon Resort, on the left side.
- Remove the balloon and center map on (A)
using your right click menu. You may have to re-center by hand click and drag as you are zooming in to keep the
(A) centered.
- Make sure you are in 'Satellite' mode.
- The green on fairway #1 is directly North
of (A) (just a smidgeon) on the E/W fairway that lies directly above the buildings. Use the greens map as a comparison.
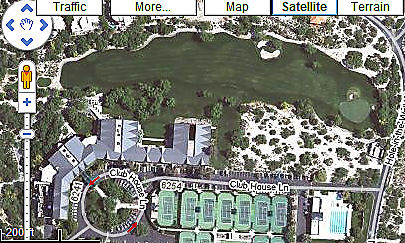
- Find the green (You might even be able to
see the flag on some of the greens) and use the Google app 'GPS Location' to determine the lat/long coordinates of that point. [How to easily set up
and use 'GPS Location' is discussed in the referenced article as well as how to use Google Maps on this and similar
projects.]
- Notice, that unlike the original article
where you were sending the coordinates to your GPS via Google Maps and Garmin Communicator Plugin, with this technique
you are using the coordinates
as part of a .csv file that
you are preparing.
- Highlight and copy the coordinates that
appear to your clipboard. They may look something close to: 32.322270, -110.842722
- Open a blank Notebook document (or other
text editor) and paste in the coordinate.
- WARNING - the
coordinates are not in the correct order for your Garmin. You will have to reverse them to long/lat [-110.842722, 32.322270,] (comma belongs) Do so when you copy and paste them. Now add an identifier after the last comma. In this
case, 'Hole #1' would be sufficient.
- Your result would be: -110.842722, 32.322270, Hole #1,
- Now do holes 2 - 18 in the same fashion
making your comparison with the Course Map and the Google Maps presented satellite map.
- When you have finished, 'Save As' the file,
naming it 'Ventana_Canyon_Mountain_Course.csv' in a folder named GOLF
which is inside your My POI
Folder (where you keep your
POIs that you send to your GPSr using POI Loader.) Make sure the file is saved in the '.csv' file format -- not
as a .txt file. [Of course you might use other folder and file names. The above is just for the design of this
experiment.]
I've already done it for you and you are
welcome to copy the list or just use it as a format guide when preparing others. Of course, trying it yourself
will give you the necessary experience. After a couple of holes -- you will be an expert.
File name: Ventana_Canyon_Mountain_Course.csv
Remember the correct order, longitude
then latitude.
Contents of File:
-110.842722, 32.322270, Hole #1,
-110.842921, 32.326064, Hole #2,
-110.842840, 32.327456, Hole #3,
-110.838288, 32.324081, Hole #4,
-110.840606, 32.322923, Hole #5,
-110.841469, 32.321896, Hole #6,
-110.837827, 32.321953, Hole #7,
-110.841984, 32.320819, Hole #8,
-110.846303, 32.320085, Hole #9,
-110.846171, 32.316669, Hole #10,
-110.842355, 32.314368, Hole #11,
-110.846324, 32.316016, Hole #12,
-110.846625, 32.318739, Hole #13,
-110.847443, 32.320575, Hole #14,
-110.849755, 32.323746, Hole #15,
-110.848274, 32.323652, Hole #16,
-110.847993, 32.327397, Hole #17,
-110.847284, 32.322515, Hole #18,
Saved in a Folder: GOLF
Which is, in turn, housed in Folder: My
POI Folder
When you next use POI Loader which is pointed to 'My POI Folder' your GOLF and
other contents of My POI Folder will be sent to your nüvi and will be reflected in the 'Extras/Custom POI'
area when you select your 'Where To?'
Now, when it come time to visit the Golf course you will make some adjustments to your Settings -- Off Road, Kilometers or Km, Track Up or North Up [see
referenced article.]
As you play each link you access your Custom POIs / GOLF / the correct course / the correct hole; and either read
your distance from the Map Screen or the Trip Information Screen, as it applies to your individual unit. Yardage
information is calculated using the 'Dorsey's
Trick.'
I'm told by my old friend, Al Tillinghast, that using this technique is guaranteed to lower your handicap.
 |
Don't Forget!
When you leave the Club House for your return trip
home to reset the preferences that you changed -- particularly changing your Route Preference from the temporary
'Off Road' setting and your Units back to what you normally use - if necessary.
|
-=-=-=-=-=-=-=-
[Added June 14, 2009]
Contributor Michael Dorsey has an additional idea, borrowing
from a technique used in the earlier "YES VIRGINIA, THERE IS MORE THAN ONE VIA POINT AVAILABLE" article.
Before he goes to the golf course he first clears the 'Recently
Found' list on his nüvi and then enters
each hole, starting with #1 for the course he will be playing via the
'Where to?' > Extras >
Custom POI > Golf Course (named)* > Particular Hole > Back.
(*) You may set up your file system a little different using another layer of folders but I have used
the basic system here to avoid some confusion.
At this point you are ready for the next choice from the list. He continues for all 18 holes.
When you chose the 'Particular Hole' it
was sent to the 'Recently Found' menu.
What this does is 'salt' the 'Recently Found' listing with
a list of the holes with #18 at the top of the list and #1 at the bottom. They will be the only items in the displayed
listing.
Now, when he is on the links, he finds it easier to set up each hole by going to the
'Where to?' > Recently Found
> scrolling to the bottom of the list of 18 and selecting it > Go
When finished playing each hole, that hole gets automatically transferred to the top of the list (because it was
just recently found) -- that's why he selects from the bottom for the next hole.
Now when actually playing golf on the course, he presses
GO >, as mentioned, to play the hole, then Menu > Stop > is required
to finish one hole and get ready to select the next from the 'Recently Found' menu.
He feels, "Selecting from the Custom POI list (as discussed in the main article) requires more time while playing golf on the course and it is difficult to find
the right hole because they are listed by nearest location in the Custom POI file."
Michael also uses an addition technique where he creates
.klm files of each golf course using Google Earth, converts them into .csv files and uses POI Loader to send them
to his nüvi as Custom POI files. I am not ready to discuss .klm files at the moment, but when I do I will
include directions here and in another article which will cover .klm.
081220

|